
Here’s a step-by-step guide on how to complete all the Easter Eggs on Haven’s Hollow in Call of Duty: Warzone, and unlock all associated rewards — from calling cards to decals, perks, and the “master” camo. This is based on the most up-to-date run-through from the community. GameSpot+2Skycoach+2
🎯 Overview — What You Can Unlock
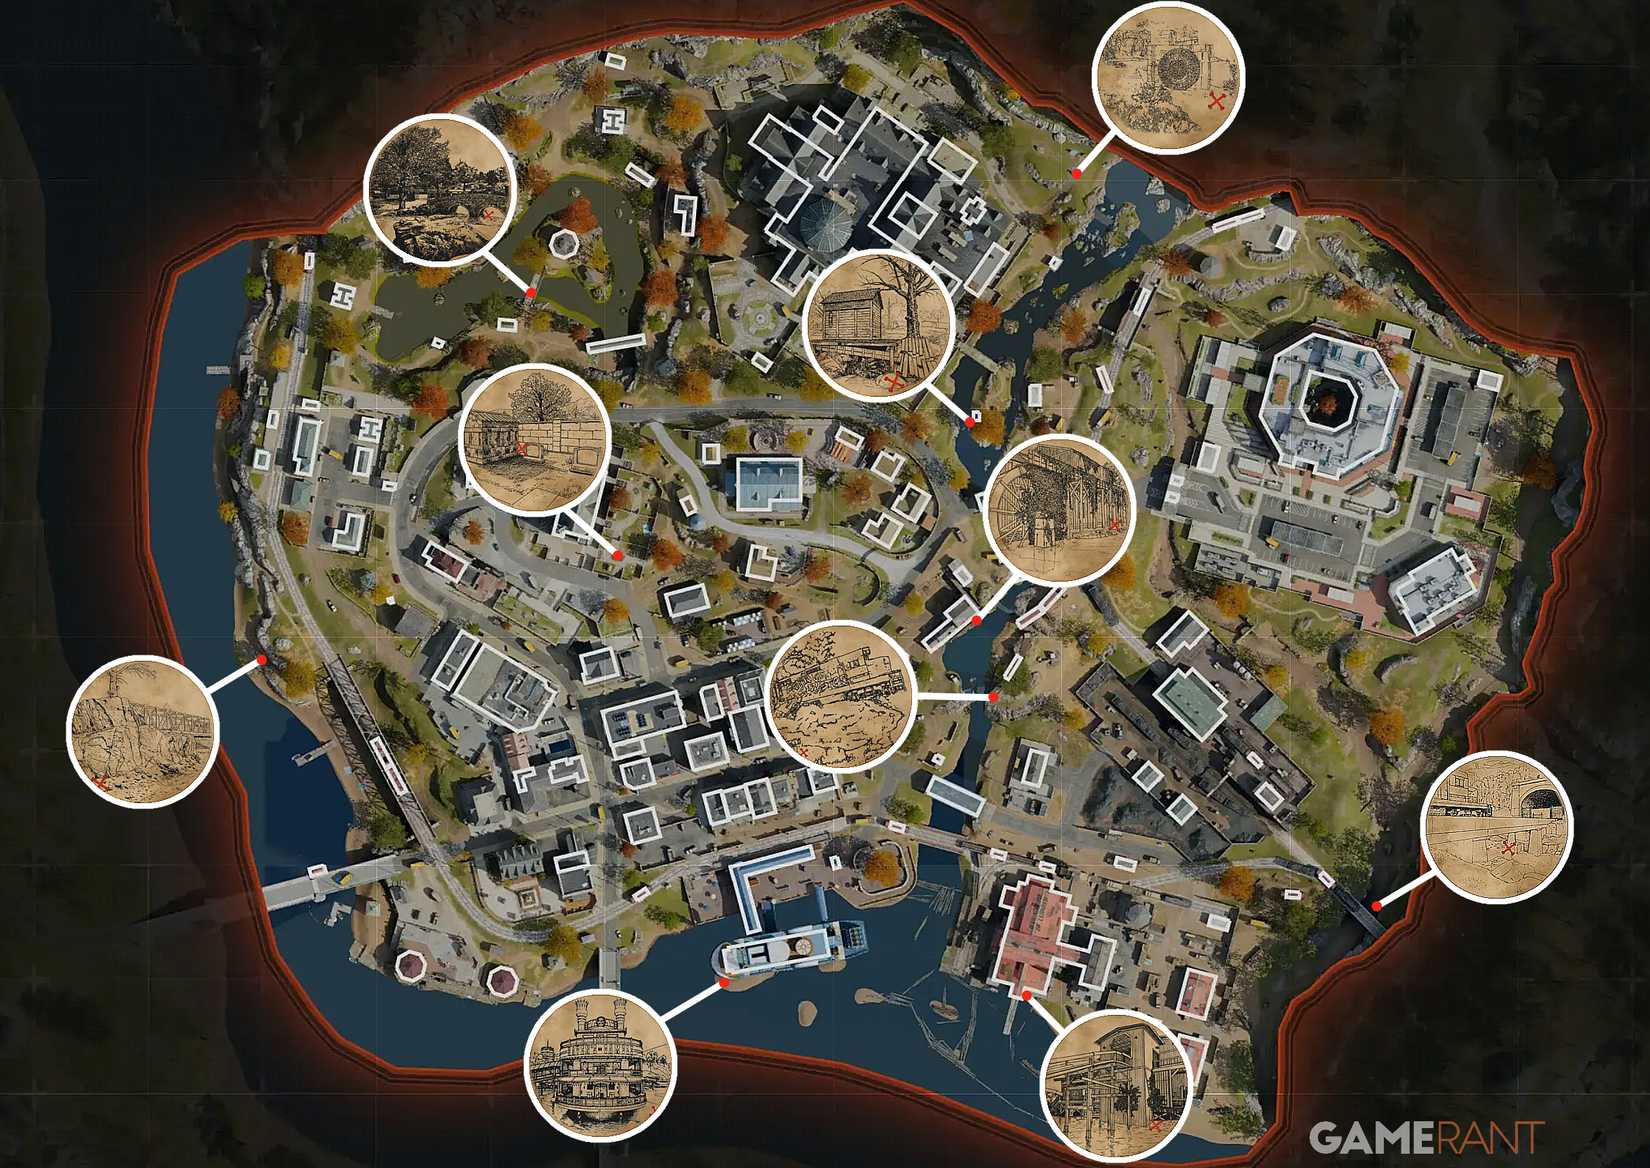
On Haven’s Hollow, there are six main Easter eggs, each offering unique rewards. Completing them all unlocks a final “master” reward (the “Now You See Me” universal weapon camo). GameSpot+1
Here’s the list of Easter Eggs + their main rewards: GameSpot+1
| Easter Egg | Reward |
|---|---|
| Buried Treasure | “Waterfall Cave” Calling Card |
| Cowboy / Wanted | “Dead or Alive” Emblem |
| Jackalope Hunt | “Beast Keepsake” Weapon Decal + Specialist Pack |
| Pied Piper | “The Doc” Weapon Charm + high-tier loot |
| Security Room | “Security Booth” Calling Card + loot + killstreak / reward items |
| Blood Moon Ritual | “Blood Moon Ritual” Calling Card + map-wide Blood Moon event + loot |
You can complete them in any order, and — with good planning or a full squad — even in a single match. GameSpot+1
✅ Step-by-Step: How to Complete Each Easter Egg
### Buried Treasure Easter Egg
4
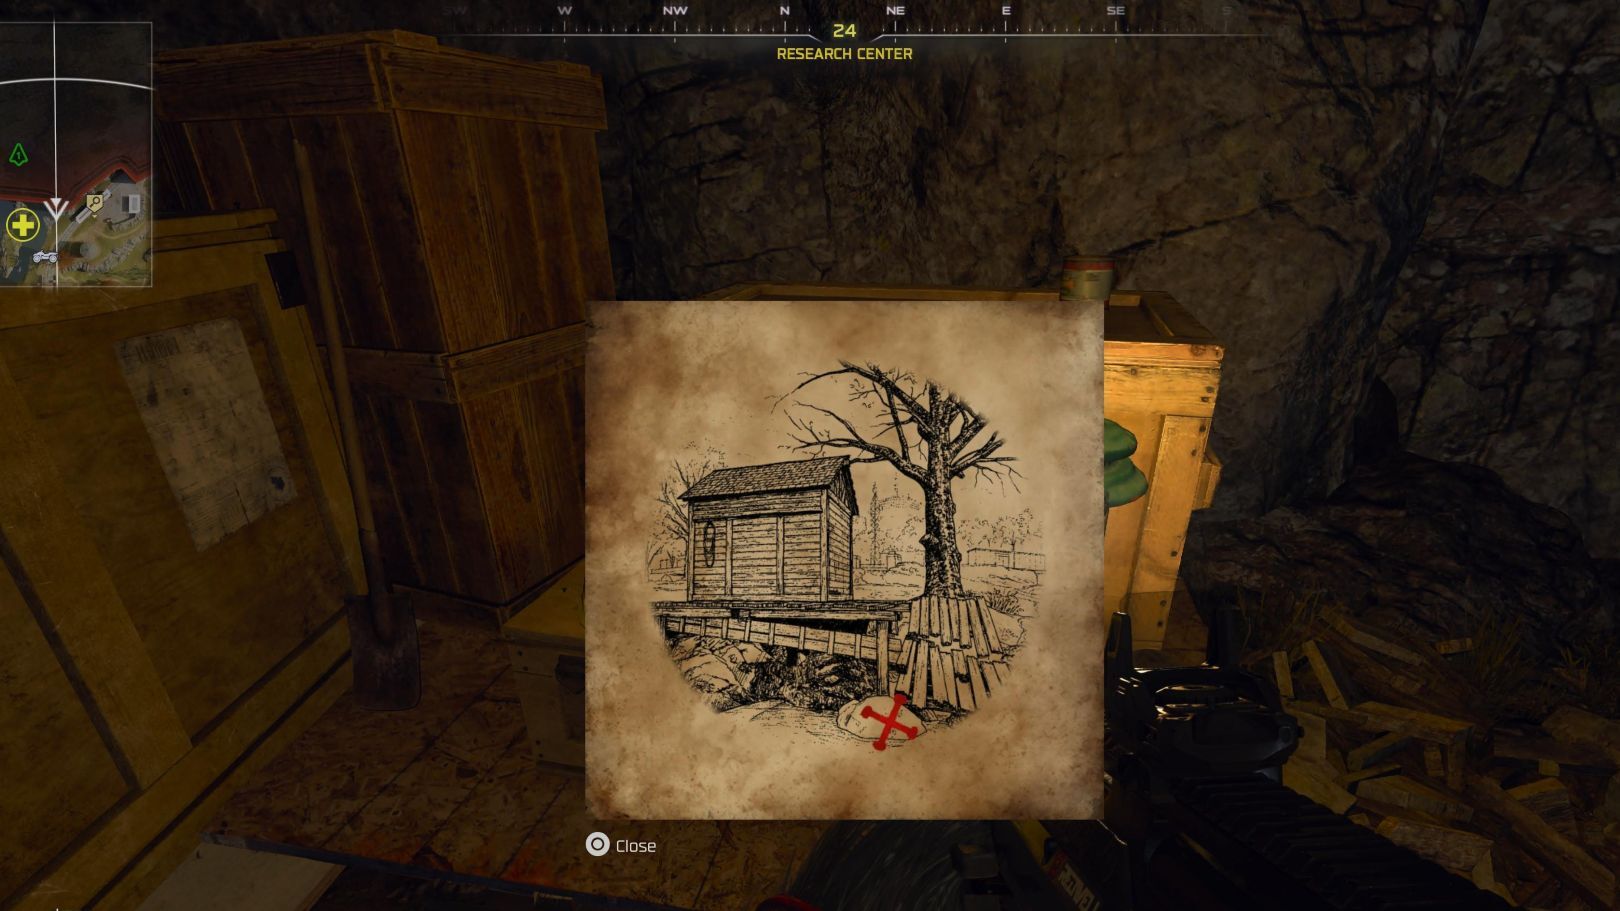
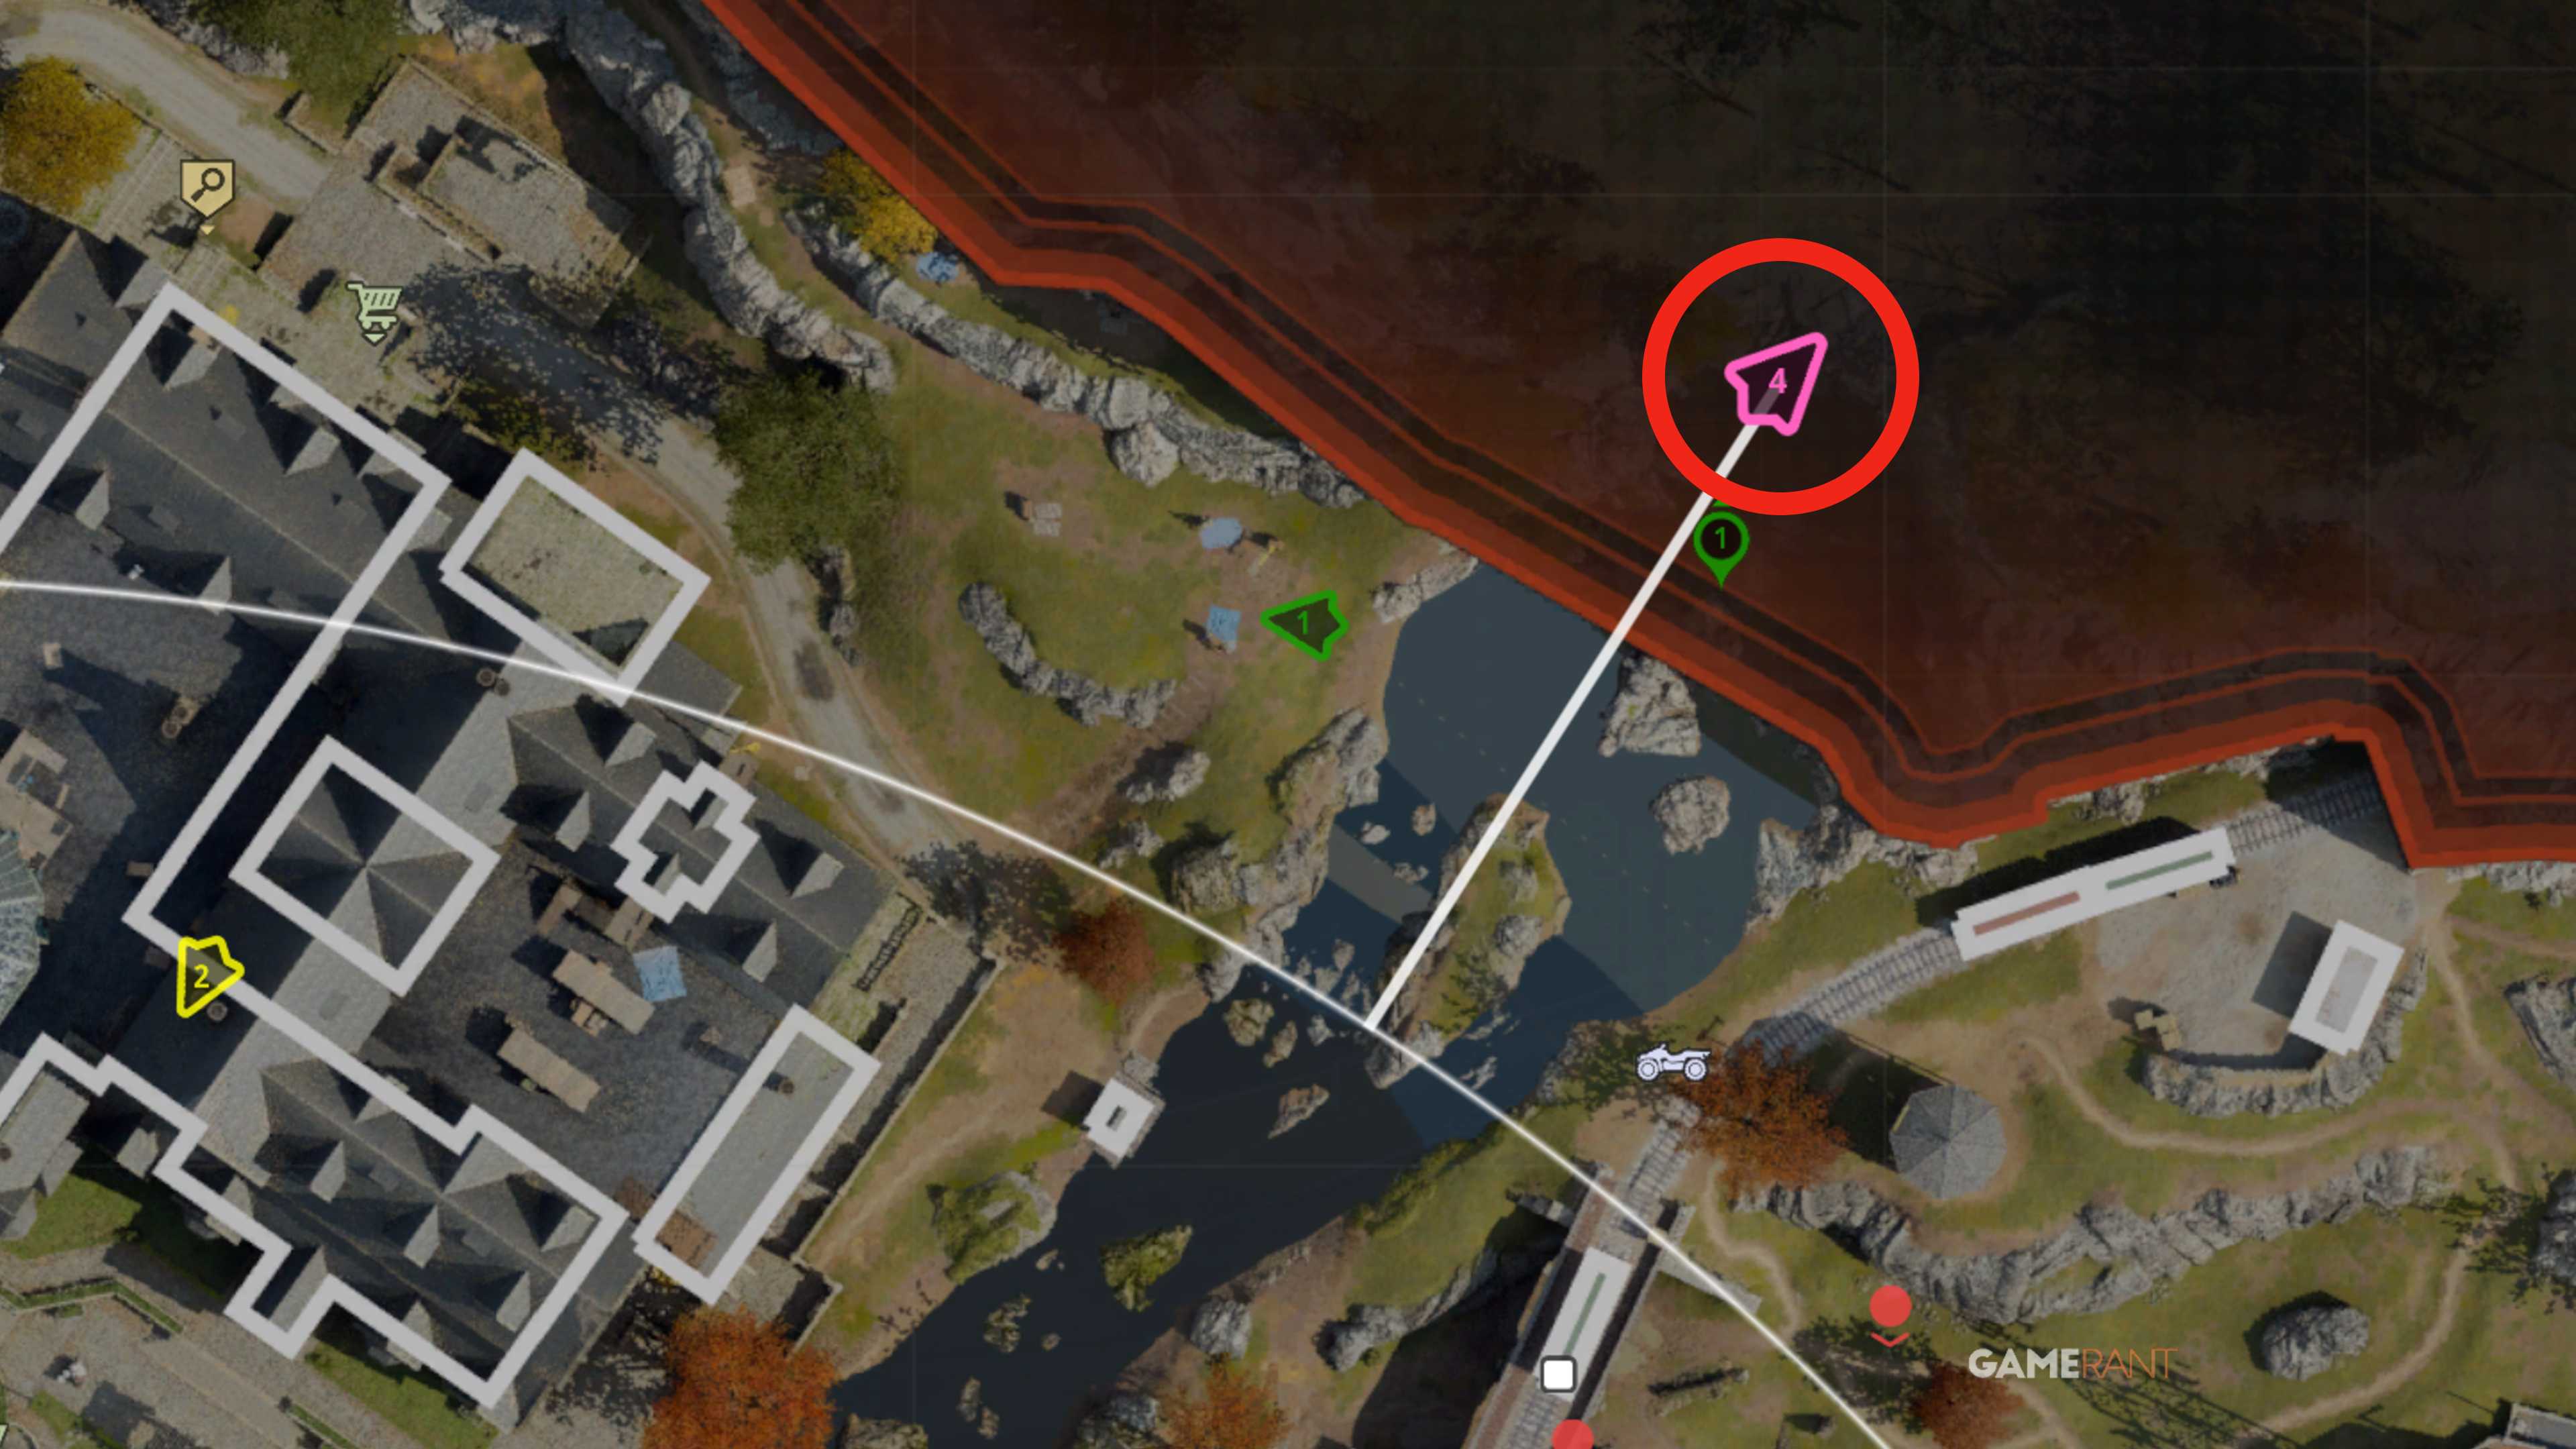
- At match start, parachute to the waterfall area in the northern portion of the map — there’s a cave behind the waterfall. GameSpot+1
- Inside the cave, grab loot from the orange supply boxes (for gear), then locate and interact with the treasure map sitting on crates toward the back. This map will show a drawn “X” marking a location (often a yellow shed downstream from the waterfall — but location may vary). GameSpot+1
- Head to the marked spot and dig (you’ll get a “Dig” prompt). Doing so completes the Easter egg — granting you cash for the match plus the “Waterfall Cave” calling card. GameSpot+1
### Cowboy / Wanted Easter Egg


4
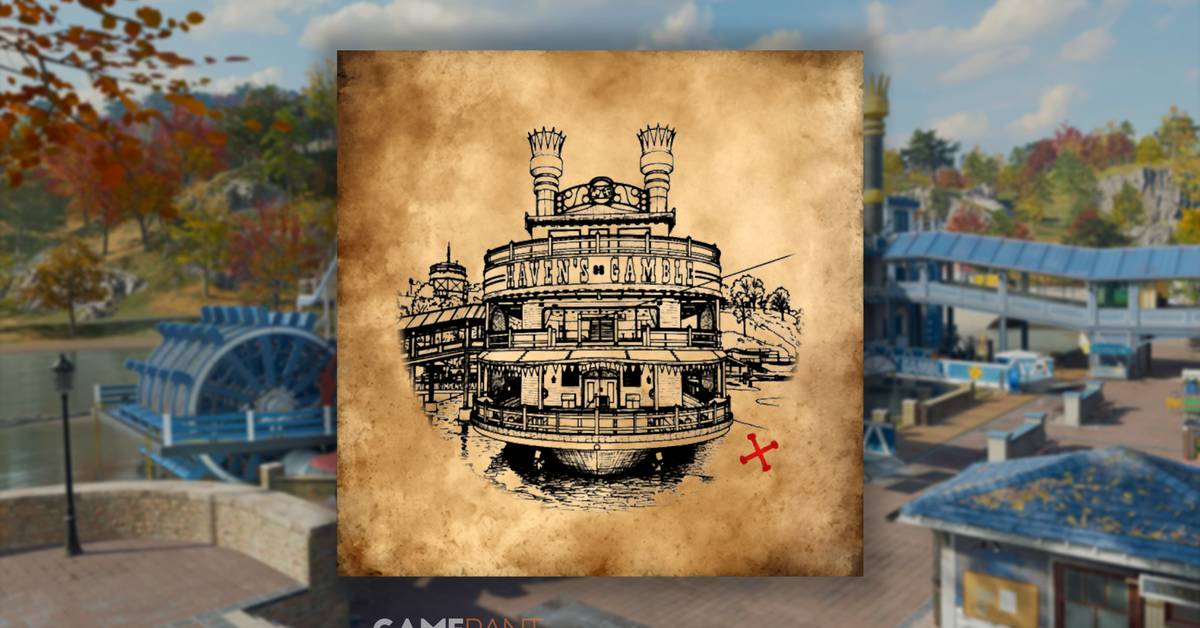
- Land at the old western section of Main Street, opposite the Riverboat POI. GameSpot+1
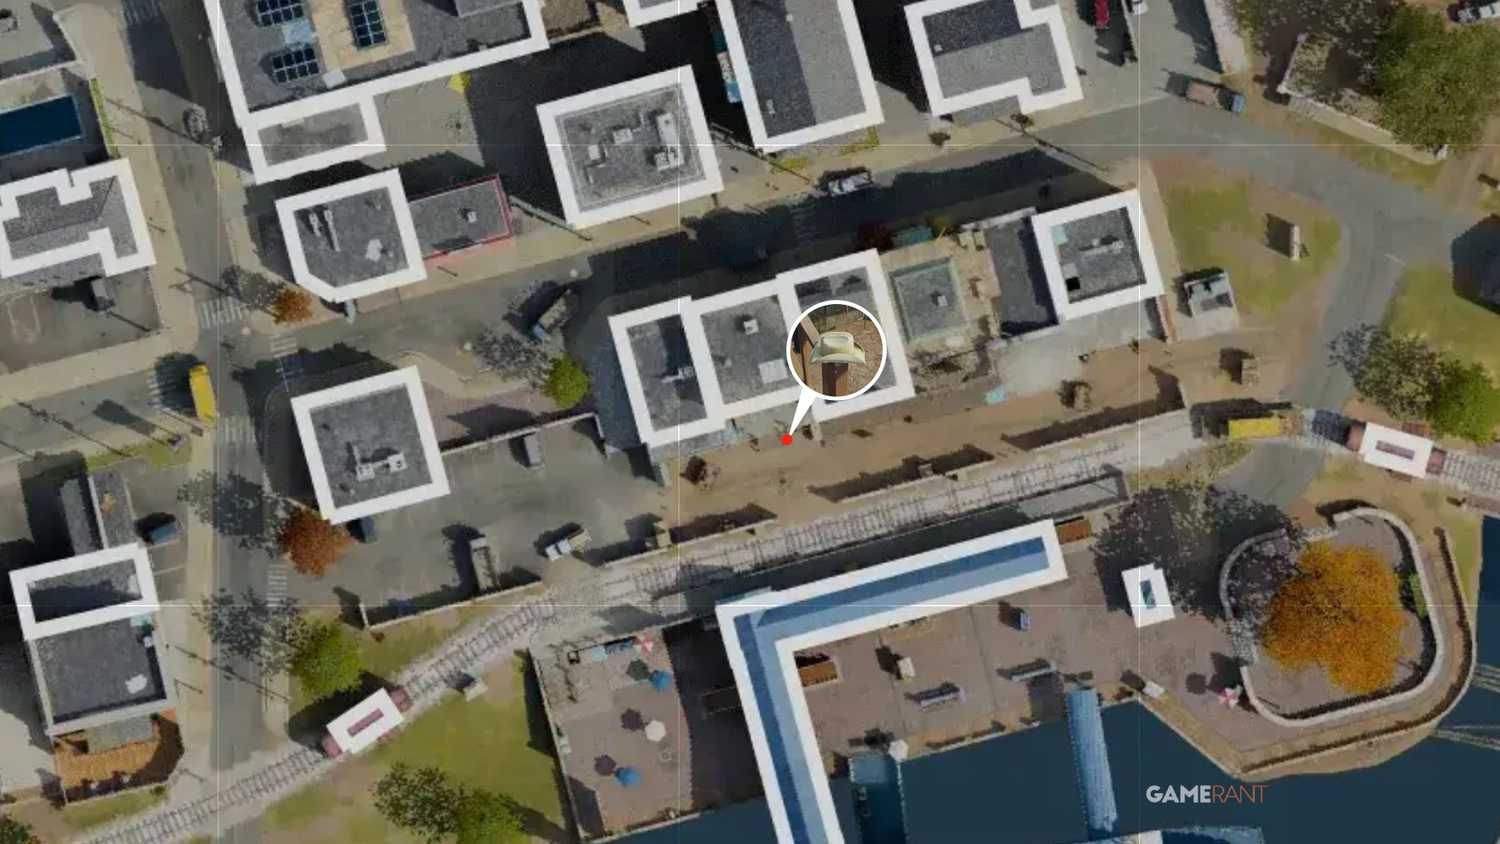
- Collect the three items — cowboy hat (on stair railing), cowboy boots (in the attic), and bandana (inside the clothing shop next door). Be careful — if you die, you drop these items and someone else can grab them. GameSpot+1
- Once you have all items, go back to the street to the “wanted-poster” board (a sheriff poster with face holes). Crouch and put your operator’s face in the hole. After a few seconds, you’ll see a flash — triggering a Bounty Contract. GameSpot+1
- Complete the Bounty Contract: either kill the marked target or survive for 3 minutes. Once done, you’ll receive cash and the “Dead or Alive” emblem. GameSpot+1
### Jackalope Hunt Easter Egg


4
- Drop near the Pond POI. The Jackalope (a glowing rabbit) randomly spawns near water paths — look for a purple-blue glow or sparkly trail. Windows Central+2Xbox & Play Games+2
- Shoot the Jackalope when you spot it — it will drop loot including a “Jackalope Item” if successful. Windows Central+1
- With the item in hand, go to the Hunting Lodge on the northern side of the pond. Inside, above the fireplace, you’ll find a mount spot. Interact with it to mount the Jackalope. Windows Central+1
- Mounting it unlocks the reward — a Specialist Pack (which gives full perks) and the “Beast Keepsake” weapon decal (plus XP and first-time completion bonus if applicable). Windows Central+1
### Pied Piper Easter Egg

4
- Land at the Mansion POI. Go to the elevator shaft at the back of the mansion; on the backside of the elevator is a fuse box. Interact with it to collect a fuse. GameSpot+1
- Take the fuse to the small tool shed outside (front of mansion). Install the fuse in the empty fuse box there. Be cautious — if you die while carrying the fuse, you drop it. GameSpot+1
- Return to the mansion and search for cheese wedges (they spawn randomly). Each cheese marks a corresponding mouse trap hidden on the floor below. You need to shoot three mouse traps per match. Once three are destroyed (by you or other causes like explosions), you’ll hear a “squeaking mice” audio cue. GameSpot+2Xbox & Play Games+2
- Then exit to the front fountain area. Around the fountain are pressure plates, each emitting a musical note and labeled with letters. Step on the plates in the order E → D → C (make sure to choose the correct “C” plate — not the lower-C variant if two appear). GameSpot+2Skycoach+2
- If done correctly, the fountain rises, revealing a secret underground lab. You can enter to loot high-tier crates/chests. You also get the “The Doc” weapon charm, plus bonus loot and possibly extra perks/gear. Xbox & Play Games+1
### Security Room Easter Egg


4
- Land at the Research Center POI — but go to the smaller building east of the main block. Head to the ground floor to reach the server room. GameSpot+1
- In the server room, locate a server display showing red/green lights. The top row corresponds to upstairs computers; the bottom row to ground-floor computers. The goal: interact with the computers matching the red lights. For example, if the far-left bottom light is red, go to the far-left computer on the first floor and interact with it. Repeat 2–3 times until all server light indicators turn green (and screens go orange) — this signals success. GameSpot+1
- Then go up to the security room on the first floor and examine the security monitors. A random 6-digit code will appear on screen. Write or screenshot it. GameSpot+1
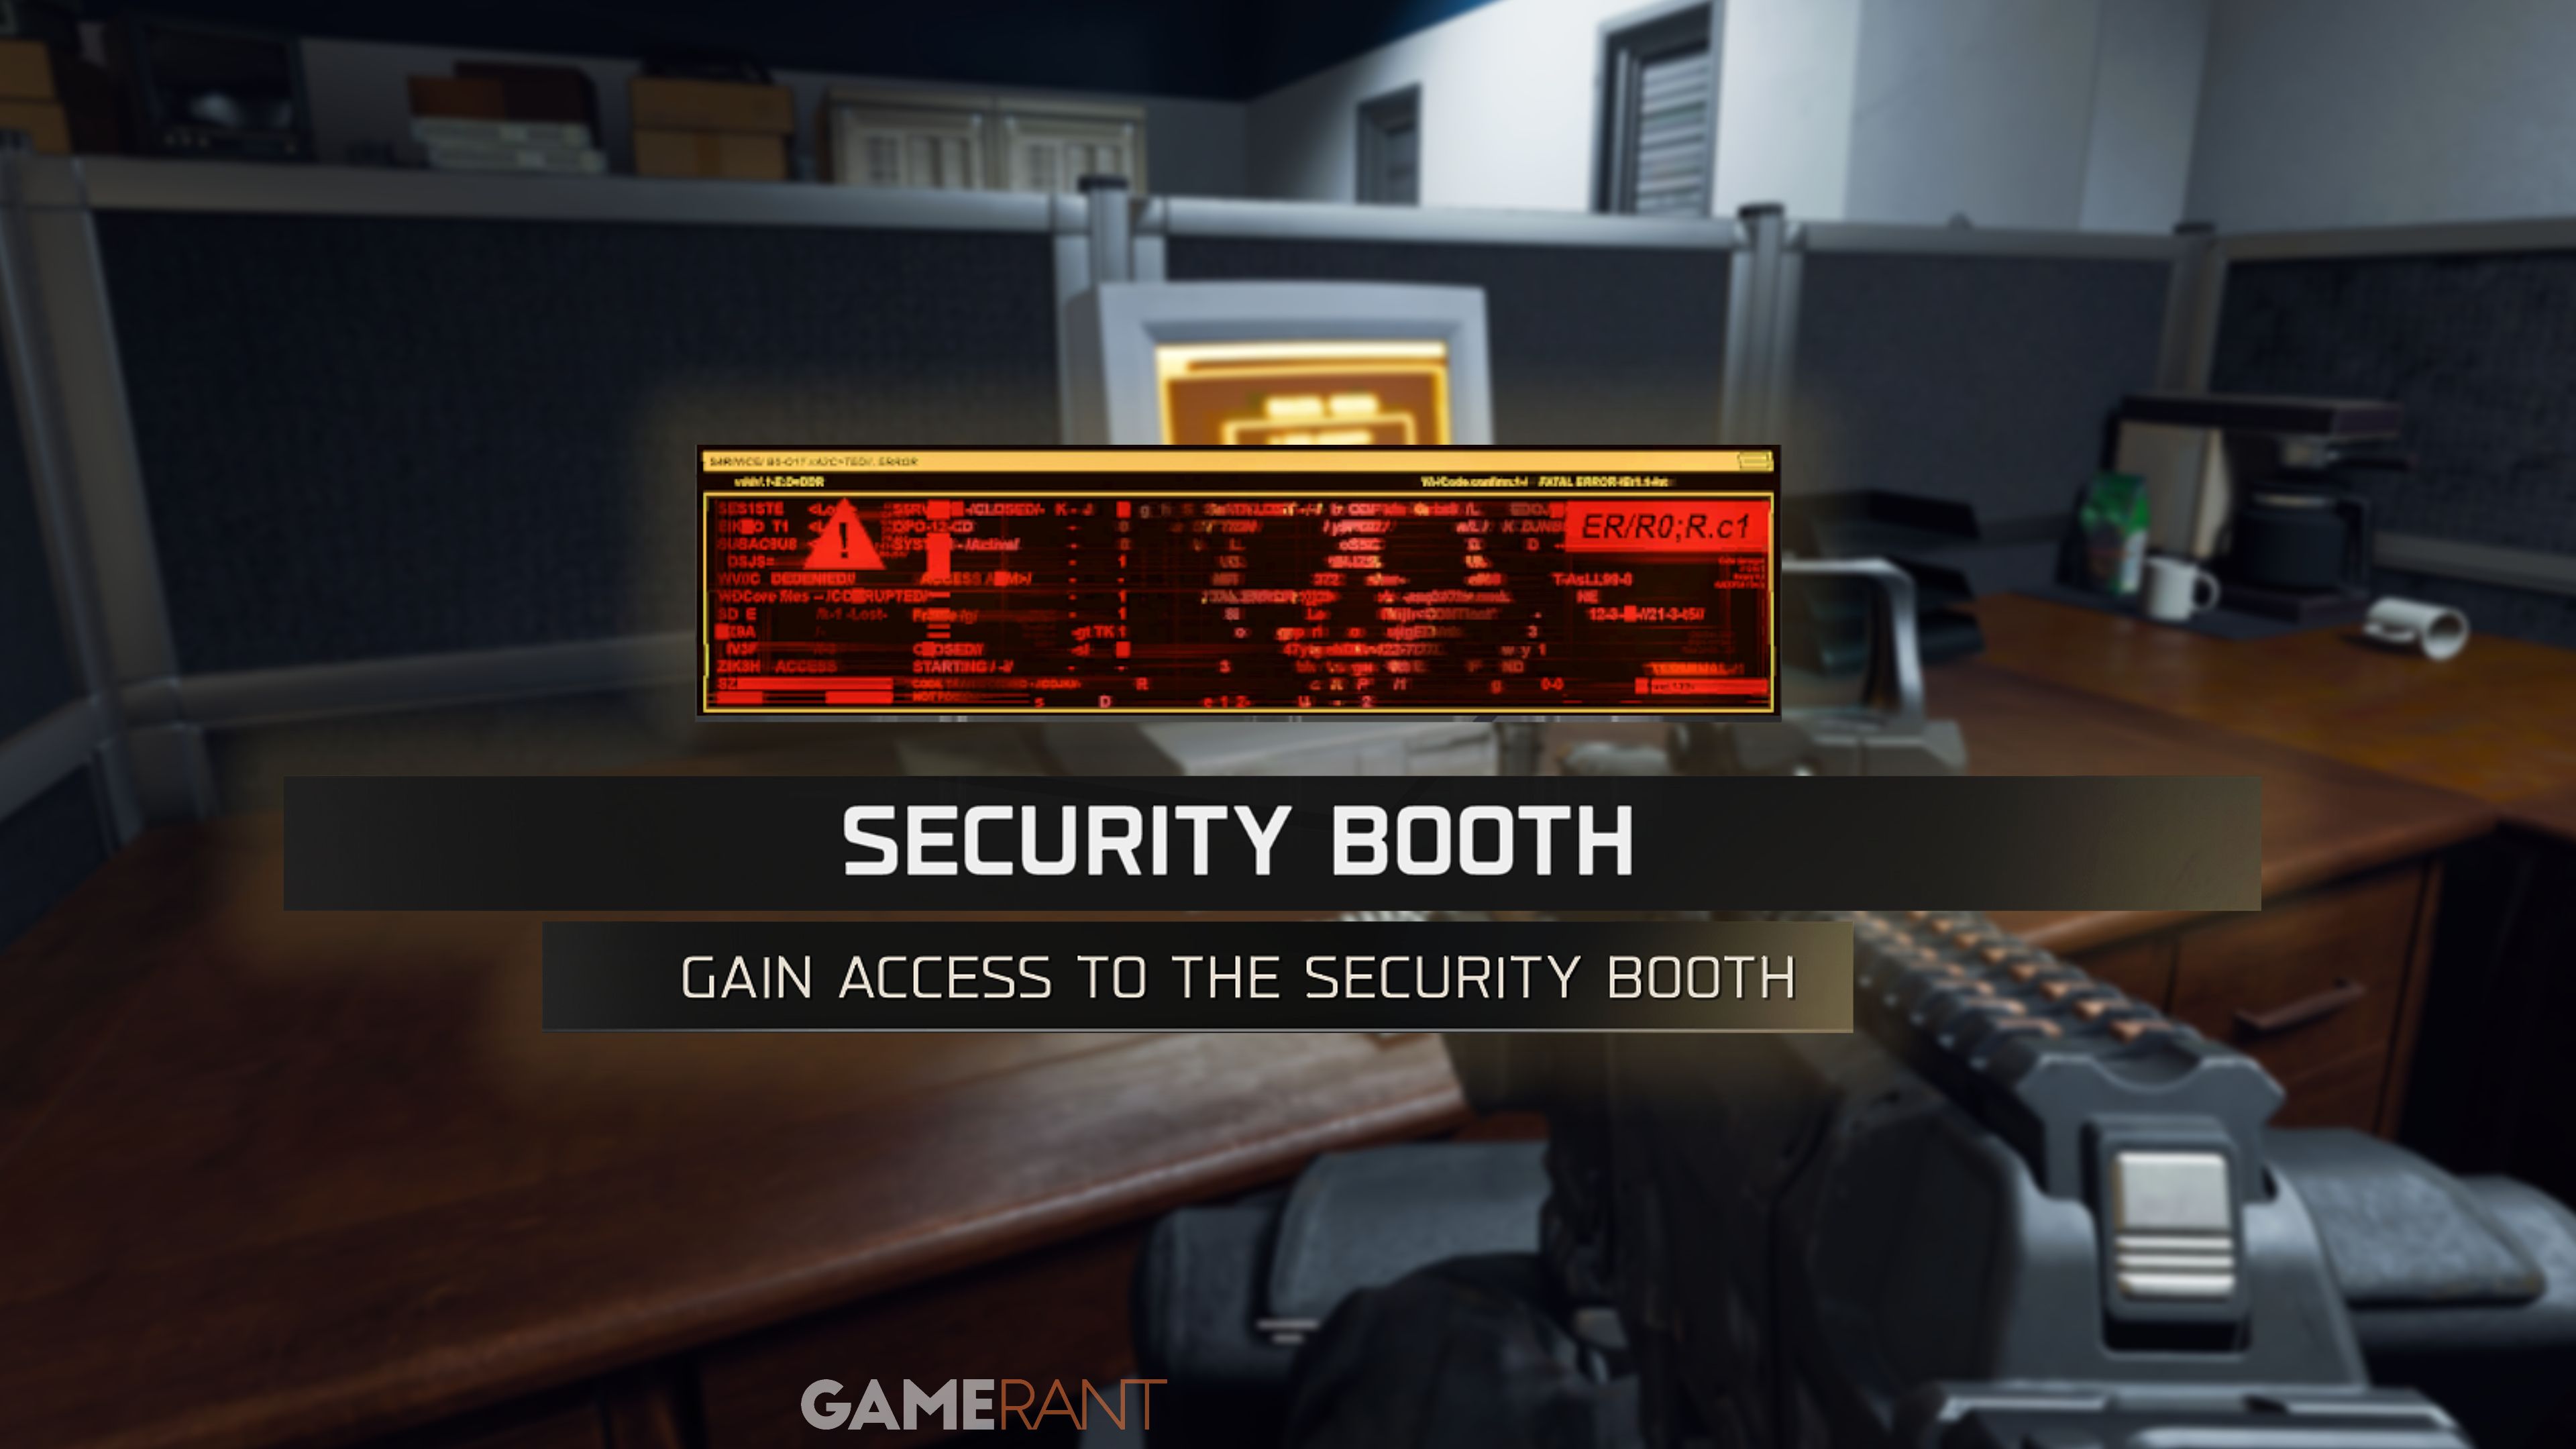
- Head outside to a small security building near the entrance of the POI. Inside is a locked door with a keypad — enter the 6-digit code. This unlocks the Easter egg. GameSpot+1
- Rewards: opening the door grants high-tier loot (orange boxes), often an Advanced UAV streak, plus the exclusive “Security Booth” calling card. GameSpot+1
### Blood Moon Ritual Easter Egg (The Grand Finale)

4
This is the most complex Easter egg — friends or squadmates are strongly recommended because of the multi-step nature.
Phase 1 — Symbols Trigger
- Go to the Mansion attic, find the old gramophone (it randomly spawns there). Pick up a Psych-Grenade (spawned randomly), and throw it onto the gramophone. Then turn around and interact with the mirror behind you. This triggers a jumpscare and reveals three symbols, each corresponding to a ritual item: bone, blood, rock. Memorize which symbol corresponds to which item. GameSpot+1
Phase 2 — Collect Ritual Items
You need to gather three items — one for each symbol:
- Blood Vial: Found in the upper floor lab at the Research Center — inside one of the white canisters with an open lid. Melee to get the vial. GameSpot+1
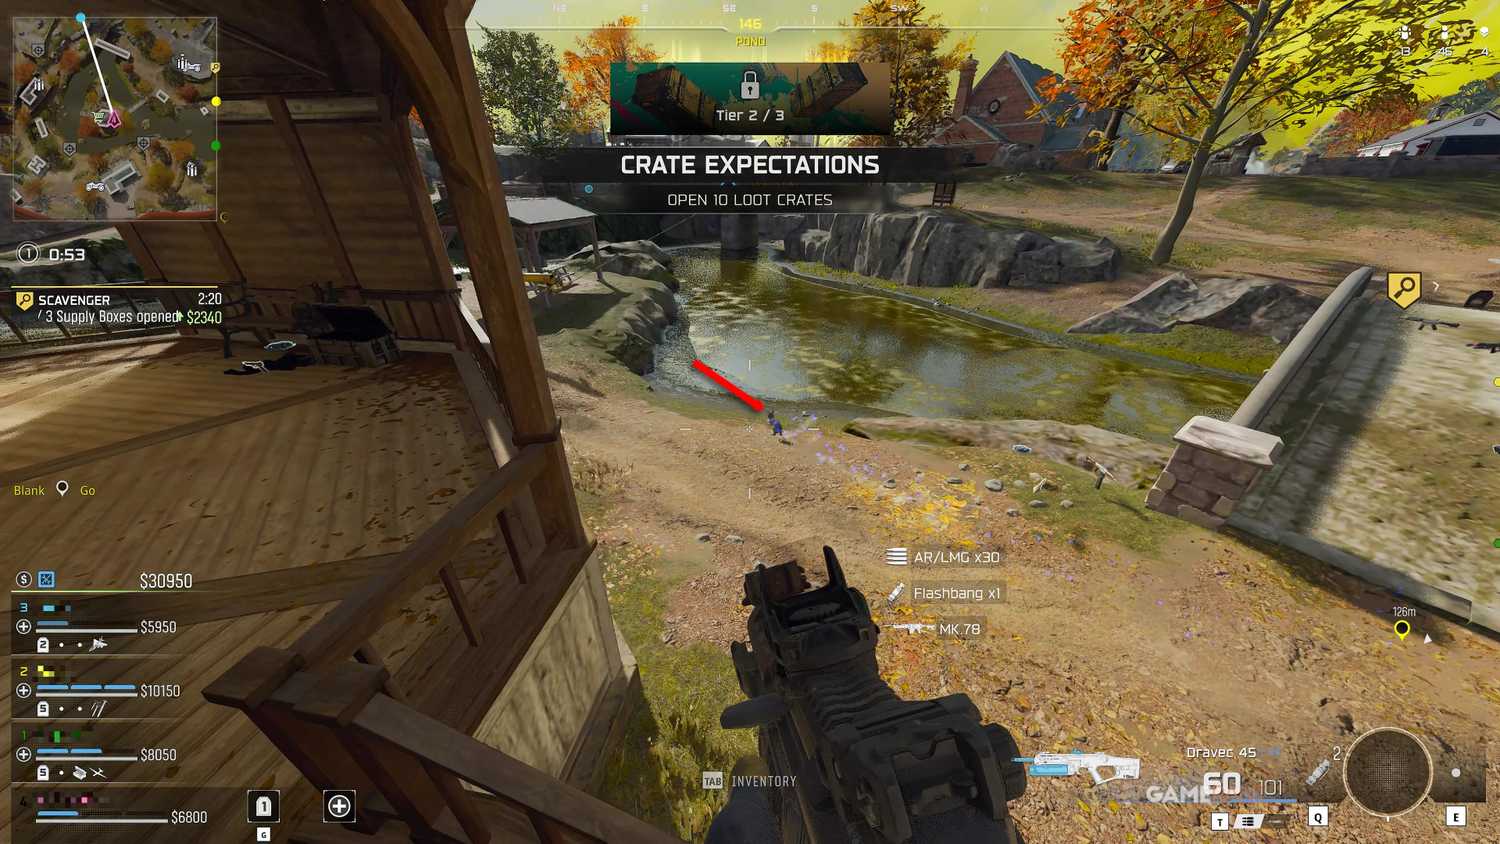
- Animal Bone: Located at the Pond POI. Search under wooden piers or docks, especially near the island with the gazebo or surrounding piers. Crouch while searching — items appear highlighted. GameSpot+1
- Rock (or equivalent item): Found at the Coal Depot. Look for a yellow miner’s hard hat turned upright (not upside down). Melee it to reveal the rock beneath. These hats can spawn on coal containers, near barrels/sheds, or against brick walls outside. GameSpot+1
⚠️ If you die while carrying an item, you drop it — so try to stay alive until you deliver it.
Phase 3 — Complete the Ritual
- Once you have all three items, head to the Barn POI. You’ll see a ritual site appear next to the barn (grass area). On your map, a marked ritual circle appears. GameSpot+1
- Place each item on the correct symbol (matching what you noted earlier). If done correctly, a pillar with a sword emerges in the center. Pick up the sword. GameSpot+1
- Once you have the sword, stay inside the marked circle and score 5 kills while holding the sword (kills by teammates or kill-streaks/equipment count too). Once the fifth kill is registered, the ritual completes, triggering a Blood Moon transformation of the map (visible to all players). GameSpot+1
- Reward: Blood Moon Ritual calling card + likely high-tier loot / map-wide event reward. GameSpot+1
🎮 Best Practices & Tips for Success
- Try to complete these Easter Eggs in low-pressure lobbies (casual Resurgence mode recommended) — fewer enemy players means fewer interruptions while you gather items. GameSpot+1
- If playing solo, go for the simpler EEs first (like Buried Treasure or Jackalope Hunt) — saves time and lowers risk.
- For complex ones like Blood Moon Ritual or Security Room, a full squad is best. Split tasks (e.g., one grabs items, others scout/cover).
- Always pay attention to audio/visual cues (e.g., glowing rabbit for Jackalope, squeaking mice for Pied Piper), those often trigger the next step.
- Hold onto special items (fuse, ritual items) carefully — avoid risky engagements until you complete the step.
🏆 What You Get If You Finish Them All — And Why It’s Worth It
- All unique calling cards, emblems, weapon charms and decals associated with each Easter Egg. GameSpot+1
- Specialist Pack from Jackalope Hunt — gives you full perk loadout for that match. Big advantage. Windows Central+1
- High-tier loot, killstreaks, cash — especially from Security Room & Blood Moon Ritual, which can put your squad ahead early. GameSpot+1
- The “master” reward — the “Now You See Me” universal weapon camo (works across weapons). GameSpot+1